Sunday, 28 February 2016

Paper-Cutting

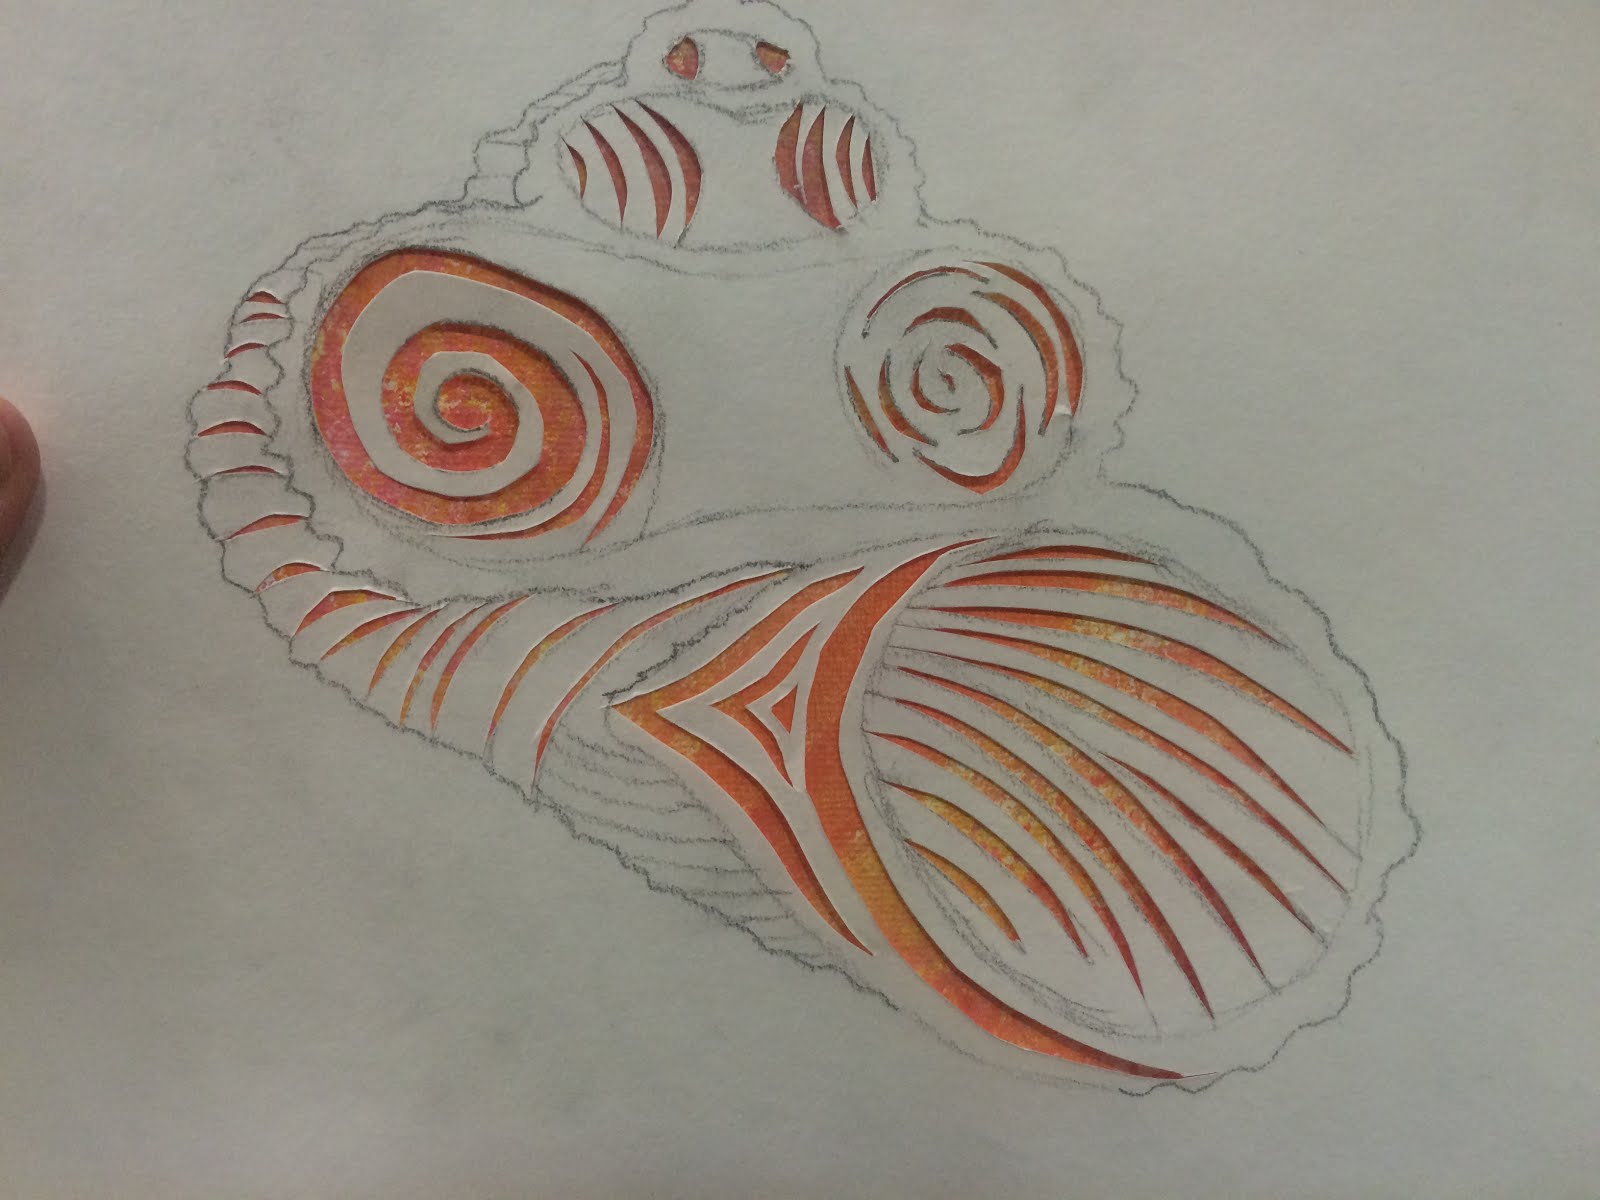
I drew a shell and decided to show the shape of the shell by cutting out different patterns within the shell to give it texture and to see the different layers of the shell.


I started by cutting patterns into the areas where the shell was hollow, trying to keep it quite compact to represent the shadow within the hollow area.


I found that some knifes were sharper than others and I personally found it easier to cut the curvier lines with a blunter knife as it didn't cut the cartridge paper as easily so it was more controllable.


I then started to cut lines where the texture in the shell was, to try and give it more of a 3D effect with shadowing and texture.


Here, is a photograph of the paper-cut out with the ceiling light shining through. I feel as though this didn't work very well as the light only shines through a small area of the paper-cut out as the light is too small so it doesn't have much of an effect. I also feel like even if the light shone through the entire paper-cut it would not have worked anyway as you can see in the small area where the light does shine through that the light blurs in the camera and actually covers up the paper so that you can't see the detail of the cut-out.


Here I tried to place the cut-out on different backgrounds to see what effects it would have on the paper-cut out. In the two photographs above, I used a digital background which was a blue-space scene and I think it gave the cut-out of the shell a watery effect to give the impression that it is floating on/ or in water.

In the photograph below, I placed the shell paper-cut out on top of my big final work piece from the three that I did as the background was done in the colours of shells and I think that it works well the the paper-cut as you see the background shine through with the cut out areas showing revealing the colours of the shells. I feel that for the textured area on the right I need to cut more paper away to reveal more colour and have the white paper act as the shadow area, as well as finishing it to add more shape and texture to the shell. I feel that it worked best with the painted background behind it rather than light and digital screen as it made it seem more naturalistic.

Sunday, 21 February 2016

Refinement

Before
After


I wasn't happy with this painting because I didn't think that there were enough colours in the hands and I also felt like I needed to add more colour in the shadow and background to continue the style of the rest of the painting. I also felt like I needed to continue some of the darker colours in the shells onto the hands to create a shadow effect and make them seem more 3D and actually in the hands rather than just placed on top of them.
 

Thursday, 11 February 2016

Exhibition and Critique of My 3 Final Pieces


Before
After


The two larger paintings link clearly with the theme of shells with the smallest piece being quite unclear other than the obvious crystal texture, however all three of the paintings link with the use of bright colours. I feel like the chalk shells in the biggest piece are drowned out by the vivid colours in the background and are quite transparent because of the medium, perhaps they would stand out more with some subtle white paint strokes. The placement of the pieces seems to work well to bring your attention to each piece with the focus being on the biggest piece in the centre. The placement of the small piece on top also works well as you can see the light reflecting of the salt crystals which makes them more obvious and makes the texture of the piece more visible to the person looking at it. I feel that the bottom piece works well placed there as it allows the person viewing it to see the layers of different colours in the hands and shells.

The smaller piece was produced in a similar style to the artist Karen Hansen, with the colours focusing on those in crystals and the salt crystals on the painting to create the texture and theme of crystals for the piece. The biggest piece was also produced in a similar style to the artist Karen Hansen with the focus being on the colours in the shells, to re-enhance the theme of shells there is a subtle chalk drawing of some shells with the background acting as their colour and texture. The bottom piece was drawn from a photograph and painted in the style of the artist Linzi Lynn with the use of bright and unusual colours, the colours were used to create texture, tone and shadowing in the painting so that it was obvious that it was a pair of hands holding some shells. The background consists of varying tones of a sandy-gold colour so that the attention is not drawn away from the object itself.

I feel like the placement under the light works well to an extent, however I feel that more natural lighting from the sun would help to bring out the colours in the piece and make them more vivid and bright, especially with the bigger piece as it contains many warm colours which would be highlighted by natural sunlight. This can be seen in the comparison photos of before and after as you can see in the before photo a small section that is being touched by sunlight and the colours are much more beautiful and bright than in the after picture where there is no sunlight.

Sunday, 31 January 2016

Nel Ten Wolde - Two Chosen Pieces

She does photo collage combined with mixed media, and uses photographs as the main medium for her collage. The photos can be a combination of two photos put together in photo-shop before used in her work. Her work is inspired by the landscape and her own personal journey and evolution and it is very spiritual. In her collages she aims to combine the use of photo fragments as the basis of composition, working together with drawing to create a harmonious unity.

Alhambra III (2011) - Collage and mixed media on paper

I chose this one because I liked how she carried on the photograph by drawing the rest of the setting to show what might have been there. I like the contrast between the colour from the photograph and the black and white of the drawing.


I chose the artwork below because I liked how he continued the photograph and joined it with another fragment to make it look like part of the photograph instead of a drawing. I also liked how it was all black and white so the drawing blended in more with the photograph fragments.
Silk Nispores II (2014) - Collage and mixed media on paper

Tuesday, 12 January 2016

Photography Workshop

Composition of Photographs

Composition-selection and arrangements of subjects within the picture.
.Place objects in appropriate positions
.Appropriate point of view
.Opportune moment

Lighting
.High-key lighting--low contrast
.Low-key lighting--high contrast

Make sure the camera is focused on the object you want it to be in the picture.

Rules of Composition
.Rule of Thirds--objects placed on the intersections-points of interest
.Framing--lines-real/inferred-converging lines-reflections/mirrors


.Visual Cropping
.Vantage point--different angles-high/low

.Moving in close
.Action


.Perspective--dramatic perspective-unusual viewpoints
.Symmetrical--balanced
.Negative Space-one focal point, more blank space


Photoshop

.Crop
.Lopsided--corner of image mouse-straighten image
.Paintbrush symbol with dashed line--outline specific objects-copy and paste image inside the outlined object>>>>

.Double Exposure
-Opacity--more transparent
-Montage
-Flatten image--change opacity when copied on top of another photo to reveal underneath
-Quick mash tool


'
Here is an example of two images with one on top of another which I changed the opacity of the image on top to reveal the image underneath it.


Here I cropped the image of the gnome, then I outlined the object.

I then copied the object and pasted it onto my other photo-shopped image, and I faded it slightly but kept it colourful to make it stand out.


This was another two images on top of each other with the opacity on top faded to make the frame appear underneath.

Sunday, 29 November 2015

My Three Favourite Artist Pieces


Shell Paintings- Acrylic
http://www.amiriarobinson.com/amiria-gale-shell-paintings/
These three pieces of artwork are my favourites.

In Shell Paintings I like the colours and the different tones of the colours with the earthy tones and the different shades of blue. I like how she has shown the process of her doing the painting. I like how the painting of the shell looks almost like a digital painting with the use of gel mediums. I like the idea behind the painting showing an island scenery inside the shell instead of outside the shell where the shell comes from. I like the lines created from the different shades and tones of blue that show the ripples and waves of the water around the shell and how they follow the direction of the shells outline. This artists piece of work links to my chosen theme because it is a shell which is a natural form. This artist is different to the other artists because her work directly links in with my theme being literal paintings and drawings of shells. Her style is also different with the colours being quite realistic and the work style being quite surrealist with the painting of the island scenery inside the shell. I like the lighter tones that act like the light reflecting off of the water.

Windswept - Acrylic
http://www.linzilynn.com/

In Windswept I like the bright, bold colours and the different tones of the colours that show the direction of the hairs and make the hair seem more realistic giving the impression of tiny strands grouped together. I like how the artist has taken a real thing and painted it using colours that make it not look realistic. This artists style using bright colours is similar to my observation studies of the shells using coloured chalk where I used bright colours that are not really associated or part of the shell. This relates to my theme because shells and crystals are colourful and this artists artwork focuses on colour so I could use this technique whilst doing crystals and shells to focus on the colour and to make it stand out more by using more colours on the shells/crystals.


Cool Daybreak - Acrylic
http://www.klhansen.com/Karen_Hansen/Welcome.html

Cool Daybreak is an abstract painting. I like the colour coding of this painting with the different blues with shades from almost pure white blue to dark blue. I like the texture of this painting, it looks quite rough and dotty, it would be good to recreate using a sponge to get the faded effect of the paint overlapping the different shades and tones of blue. This artists style is different to the others as her work is not a painting of a specific thing or object, it looks like an explosion of colours related to a specific thing and in this case it is daybreak. I could use this style and take colours from a specific shell or crystal and use the colours in this style or I could experiment with colours in this style and paint shells or crystals over the top and have this as the background. I like this style because you have more freedom with the strokes and what you paint. This links in to my starting point because it looks quite faded from overlaying the colours which I could use combined with my theme of  natural forms to show that it is old and faded but it is also a natural form.

Saturday, 28 November 2015

Artist Research: Artist 3- Amiria Gale

http://www.amiriarobinson.com/amiria-gale-shell-paintings/

painting of shells
Shell Paintings- Shell paintings by Amiria Gale: It is the broken, worn, incomplete shells that provide inspiration. This one has little pock marks in the surface where bugs have gnawed at it and faded brown lines that dash across the surface. The composition sketch in black pen has scribbled notes reminding me what the work was about. It is not overly detailed, but depicts the structure of the work; the placement of the shell; the landscape within and the main water lines extending out from the curves of the shell. Note that the representation of the shell is not entirely realistic, but has been slightly simplified / stylised. The shell in this painting has been built up with a very thick layer of modelling compound – at its deepest, this protrudes 20mm out from the painting board. The lower stripy section of shell is covered with bumpy, textured handmade paper. A layer of gesso has primed the work before painting with Atelier acrylic. The water has been painted using many translucent layers, with gel medium and Atelier artist acrylic paint. The finished work is 1000 x 1000mm and depicts a semi-abstract shell tumbling within the ocean, with a landscape shown through the shell. It was completed in 2004. This is probably my most well known work.

amiria gale shell painting
Shells-  mixed media piece, created using string, textured paper, modelling compound and acrylic on framed MDF board

seashell paintings by Amiria Gale
These semi-abstract shell paintings by Amiria Gale break down the barrier between land, shell and sky. Water pours around the shell and spills across sand, The top right work is 400 x 800mm and was painted on MDF board in 2003. The bottom painting, “Shells, land and sea”, is a large work, 800 x 1000mm, created using acrylic and mixed media on framed MDF board in 2005.

shell artwork
This is one of two tiny seashell paintings by Amiria Gale, completed in 2010. “Little Shell” is 200 x 150mm, created using acrylic and mixed media on framed MDF board.

mixed media shell painting
This shell has pencil scribbles inside it. I can’t remember how they got there. I was playing with it a lot, before it became the shell painting below that took me nearly a year. I kept returning to it, over and over again, burying the form with paint, and uncovering it again some more. Entitled ”Dive”, this contemporary shell painting by Amiria Gale was completed in 2010. It is 300 x 650mm and was created using acrylic and mixed media on framed MDF board.

amiria gale shell painting
This small seashell painting by Amiria Gale is entitled “Fragment” and is for sale NZ$200. Completed using acrylic and textured paper on board, in 2010, this shell painting is 200 x 150mm.

Amiria Gale shell artwork
Shell painting by Amiria Gale: I began with a weathered sea snail shell. This work, entitled “Boundary”, is 700 x 700mm, and depicts a semi-abstract painting of shells, land and sea. It was completed using acrylic and mixed media on framed MDF board, in 2010, and was sold to a private collector.

Photograph of a seashell
A composition study created using black biro pen on a black and white photocopy of a seashell.

shells drawings by Amiria
Here are some of my random shell drawings.

shell painting
Sometimes, however, I work more messily and crazily. This is a faster, more gestural shell painting of mine.